Monday, March 22, 2010

spring time no more


Oh my! how long was i gone for? so many things happen between my last post and this.
well, to cut long story short, I've moved, twice in the past 6 months, did some travelling, and still, in the process of renovating my new pad. and before i can slow down and eat a piece of cake, winter came knocking! however, last weekend we were still blessed with Sydney glorious sunshine, and i wonder how long before the dark and depressing winter will totally took over? so i took some time off my crazy routine and bake a spring frittata. it's simple, easy and took me no time at all!

Spring Frittata
Ingredients:
  • 5 big baking potatoes. ( i use desiree )
  • 8 eggs
  • 1/2 cup milk
  • 150g smoke salmon
  • 1 cup cheddar cheese
  • 1 cup frozen peas
  • 1 big empty stomach !!
  1. boiled potatoes in a big pot of slightly salted water
  2. whisk the eggs and milk together.
  3. throw in 1/2 cup of the cheese, all the peas, and season well with salt and pepper.
  4. when the potatoes are ready, sliced them up thinly.
  5. lightly grease a 20cm non-stick cake pan. ( do not use the removable base one!! )
  6. lay 1/3 of the potato slices on the base of the cake pan, pour half of the egg/milk/salmon mixture, and lay another third of the potatoes, followed by the egg/milk thingy, finished off with the last third of potato slices.
  7. scatter the remaining 1/2 cup of cheese on top.
  8. bake in pre-heated 160 degree oven ( fan force ), for about 50 minutes, or until it's golden brown.
  9. wait for it to cool down 70 percent before cutting them into slices and serve them warm or cold.


it was the first thing that i bake with my new oven, in my new kitchen. and i enjoy it, with my new mini herb "potted"garden, under the fabulous weather! Yum!!

Friday, August 14, 2009

practically missing you


I have not been baking anything lately, life have been pretty hectic.
But I do enjoy a wonderful time with my family holidaying with us. All my family were here, and for once in a long long time we manage to spent a lot of times with each other, which is a very precious thing to do as we're all scattered around in different places, and when we do get together, it's often very rush and short. This time though, I make an afford to take time off and spent time with them. The funny thing about having your parent coming over for holiday is that they really just want to sit around at home and enjoy being together with you. At least, this is what my parent enjoy the most. My mum likes to share her cooking with me in the kitchen, my dad loves to tease the doggie, and my brother and I pretty much chat away, making up for all the loss time that we have not spent together. Very idyllic indeed.
Only a couple of issues with staying over at your children place is that, they dun normally have what you normally use at home! You see, I have a special love to all things beautiful but not all things beautiful are practical and functional. So i have a lot of things laying around, especially in the kitchen that are oh too pretty to look at, but they are not practical to use at all. My dad who is an avid coffee drinker, cannot find a decent sized coffee mug in my cabinet, and that frustrate the hell out of him. You see, we normally take our coffee from cafe or in the office, so i really dun have a "mug" sitting at home. that said, my cabinet is full of tall flute glasses, martini glasses, wine glasses but we're not at all an everyday drinker! I never say make sense!!
Anyway, so we went on a shopping spree to get him a decent coffee mug, but my wondering eyes took notice of this cutie soup mug instead, and of course, it found a way into my shopping basket and follow me home!

One of my childhood memory dessert was this azuki bean soup. So I beg my mum to cook it for me again, and we also added black sticky rice. It's a very simple and easy dessert and very versatile too. You can adjust the amount of beans to water ratio and adjust the amount of sugar to your desired sweetness.

Sticky Azuki Bean Soup

Ingredients:
  • 1/2 cup Azuki Beans, rinse with running water
  • 1/2 cup black sticky rice, rinse with running water
  • 6 cup water
  • 1 cup sago, soak in cold water
  • 1 cup brown sugar
  • 1 cup of coconut milk/cream
Method:
  1. Put the beans, sticky rice and water into a slow cooker. Have the button turn to high, and cook for 1 hour, or until the red beans begin to split. You can also use ordinary pot on stove, just keep an eye and make sure it doesn't boiled over.
  2. Put in the sago and sugar.
  3. Continue cooking for another 30 mins or so, serve warm or cold with a dash of coconut milk or coconut cream.

I like the soup warm, slowly sipping the sweet soup with my mum in the kitchen really does bring back lot's of memory. AND isn't that a practical and functional mug that i bought?!!

Sunday, June 7, 2009

Happy Queen's B'day!


It's Queen b'day today, although i hardly know her, but God Bless the Queen for because of her, I got to enjoy ( probably the last ) public holiday before Christmas.

Public holidays are rare and precious in Australia. All year round, we have but only a small numbers of public holidays: The New Years day, The Australia day, The Easter, The Anzac ( which was not made public holiday because it falls on Saturday this year :( ), The Queens b'day, Labour day ( which are yet to be proclaim to be public holiday this year ) Christmas and Boxing day!! We often need to make plans a few months ahead if we plan to go on a short break during the long weekend, the motel will always be fully booked, and the traffic going out of the city would also be quite dreadful, not to mention the stress of driving because of the triple demerit points during public holidays!!


Because my husband have his essay to be completed, and a record book of dangerous level demerit points, we decided not to go anywhere, and just chilled out and enjoy the surprising sunny Monday. To keep up with the Queen b'day's theme, I decided to bake a traditional English cake. Well, you need a cake for every b'day, especially your queen's b'day.


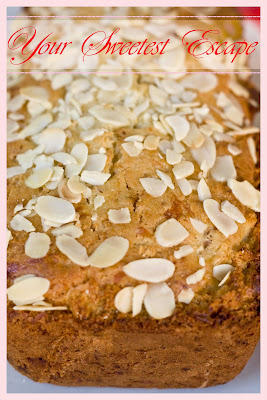
This cake was a traditional autumnal cake from the country of Gloucester shire in England. Gloucester shire is very famous for it's apples, pear and plums.The local cheese: the double Gloucester, has also been made in Gloucester shire since the 16th century and was traditionally made from milk produced by Old Gloucester cattle. It is a hard, pale orangey cheese with a creamy, almost buttery, nutty flavor and a flaky texture. Hence, the Gloucester cake, was made from the locally produced apples and cheese. I have never eaten a cake made from hard cheeses, and was very eager to try when I first read about this cake from NQN. I was lucky enough to lay my hand on some quality double Gloucester, but like NQN, i also make it with pear instead of apple because I love the juicy and sweet Corella pears.


Double Gloucester Cheese Cake with Corella Pears

Ingredients:
  • 225g Corella Pears, ( about 3-4 small sized pears )
  • 120g Butter, soften
  • 180g Caster sugar
  • 2 Eggs
  • 120g Double Gloucester, grated
  • 450g Plain Flour
  • 1/2 tsp bicarb soda
  • 2 tsp Baking powder
  • 3 tbsp yoghurt
  • 60g flaked almonds
Methods:
  1. Preheat the oven to 180 degree Celsius, line and grease a large loaf pan with grease proof paper.
  2. Grate the pear, retain all skin and juices
  3. With an electric mixer, cream together the butter, sugar and eggs.
  4. Sift together the flour, bicarb soda and baking powder
  5. Combine the dry ingredients into the wet ingredient, stir in the pear, cheese, and yoghurt. If the mixture appear to little too dry, add a dash of milk.
  6. Pour the mixture into the prepared tin, sprinkle the flaked almond on top.
  7. Bake in preheated oven for about 1 hour. Rest in the pan for about 5 mins before turning out onto wire rack to cool down further.


I like to serve the cake warm, straight from the oven, with a glass of cold chardonnay.
Oh, I'm not too sure if the Queen is truely happy on her birthday, but I sure am!!

Saturday, June 6, 2009

Are you an adventurous dunker?


They say when it comes to morning teas, afternoon teas or supper, there are only 2 types of person, the dunker, and the non-dunker. If you're the later, then a little explanation for you:
to dunk, is to dip biscuit, bread, cakes etch into beverages like coffee, milk or tea. The dunking, can soften the biscuit, and hence, able to enhance the flavours to particularly dry biscuits, bread or cake. One of my greatest childhood pleasure was to dunk heaps of "ping pong" brand soda biscuits into hot Milo. Later when I was a little bigger, and demand for better dunking biscuits like Oreo into milk. As i was getting older, i also have experimented with almost every dunking biscuits with different beverages. Lately, i fall in love with a whole new level of dunking activities, i discovered that dunking banana into hot mocha creates a wonderful taste sensation. I know it sounded a bit awful, but if you have not tried it before, i urge you to try it just once. You may like it, you may not, it doesn't hurt to try! I am totally addicted to the strong coffee aroma that comes with biting into the banana.


That is why, when i come across this banana coffee bread recipe from Australia Good Food Magazines, I know i just have to bake it. and yes, it's not a typo, it's suppose to be a bread, and to be baked into the bread loaf tin, but I don't have the big loaf tin, and I just happen to buy a silicon baba cake mould. So, it came out looking like a cake, but with the texture of banana bread. This cake/bread is also very moist, and have a very light texture, laden with coffee and banana aroma. If you remember my mission to use up the wattle seeds from the pantry, then you won't be surprise i also added wattle seed, to further boost the coffee aroma.


Coffee Banana Bread

Ingredients:
  • 3 eggs
  • 1 cup brown sugar
  • 1/3 cup oil
  • 1 cup mashed very ripe banana
  • 1 cup sour cream
  • 2 tsp vanilla extract
  • 1 cup wholemeal flour
  • 1 cup plain flour
  • 1 tsp baking powder
  • 1 tsp bicarb soda
  • 2 tbsp finely ground espresso coffee ( i use instant espresso coffee )
  • 1 tbsp wattle seeds
Methods:
  1. Preheat oven to 190 degree Celsius, grease and line a large loaf tin, or a 22cm baba tin
  2. Whisk together the eggs, sugar and oil until smooth.
  3. Add banana, sour cream and vanilla. Stir until combined.
  4. Sift the flours, baking powder, bicarb soda and wattle seeds. Add in the coffee.
  5. Add the wet ingredients into the dry ingredients, and stir until all combined.
  6. Pour mixture into the prepared tin, and bake for 50-60 mins. Cool in pan before turning it out. If using the baba mould, turn it upside down and leave to cool.

It's perfectly fine to serve it just like that, warm or cold with a dollop of cream and dusting with icing sugar, but I'm trying to be fancy and a drizzle the cake/bread with custard, and decorated with fresh sliced banana.
yeap, i love banana; and coffee.

Sunday, May 24, 2009

Go Green


In continuation of the pantry cleaning story, I also found a small delicately decorated jar of green tea, Matcha powder which i bought when I was in Japan few years ago. I have no idea what i want to do with it at the time, and I can't really appreciate the strong and bitter matcha serve to me during the tea ceremony, but i bought it anyway because it the packaging is too pretty. In fact, all the food packaging are super pretty and delicate and make fantastic homecoming gifts. However, I could not make up my mind when surrounded with all these pretty packages I ended up buying packages of mochi, biscuits, polka and other oh too pretty Japanese sweets that can't fit into my luggage bag. I still remember we're desperately trying to get a extra box ( so they dun get squash as some of the packaging is quite delicate ) to pack them, and not a lot of Japanese understand us in Takayama, but we later learnt a new word: Box = Haku in Japanese, and very soon, we're giving a medium size box to pack our shoppings!


In the recent cold and wet weather, my original intention was to bake something richer and comforting but I ran out of milk, yoghurts and cream, all the essential ingredients to bake a cake or something warming. There is no way I'm going out to the shop when the rain was pouring outside, so I have my eyes fixed on the delicate jar of matcha powder and make the easiest green tea cookies ever. In fact, so easy that the method would only consits of 1 sentence. You'll see.


Green tea Cookies

Ingredients:
  • 80g butter, soften
  • 40g sugar with extra
  • 1/2 tsp matcha powder
  • 2 egg yolks
  • 140g plain flour
Method:
  1. Combine everything together until it forms a dough, chilled it in the fridge for 15 mins, rolled out and cut with cookie cutter, sprinkle with extra caster sugar, bake in preheated oven (160 degree Celsius, lesser if fan force ) for 15mins.( depending on the thickness too! )
  2. While still hot and soft, sprinkle more caster sugar on top and cool on wire rack, it'll become crispy and firm up while cooled, enjoy it before serving to anyone, or else you'll surely missed out as they taste like manna from heaven!


OK, so it's more than 1 sentence, but still, it's really easy cookie with a big taste!

Sunday, May 17, 2009

A taste from the outback


We have been doing a lot of cleaning and clearing at the moment, though my house seems tidy over all, we were still amazed at the amount of junks hiding in the cupboard, under the bed, behind the sofas....some of these things are brand new unwanted gifts, some of them were the result of impulse buying, and most of them were just junk that we thought it will be useful so we kept them at the time, but we've never really needed them. Even though husband and I are no haorders, some of the junks were difficult to get rid off, especially those that hold sentimental values, like my engagement and wedding flower bouquet. They have been drying quite nicely, and been sitting on the shelf beside my wedding photos, but even dead and dried flowers have their used by date, and lately they have been deteriorate quite rapidly, and the dried patels began to turn into fine, powdery " ash". Husband have been asking me, no, begging me to get rid of the pile of patel ash, and finally, I had but no choice to put them ( unwillingly ) into the big black plastic bag together with other junks.

My pantry is another place with a lot of hidden junks, and gems. I'm absolutely delighted when I found a jar of wattlseeds sitting nicely behind the many other cans of food inside the pantry. I remember searching high and low for it after I read about these particular spice from a cooking book, and finally bought it from the Essential Ingredients, alas, never used it after!! I was so relieved to find that the use by date is still one long year away, and I swear to myself that I'll use it in my next baking. Wattleseeds are Australia native spice, they are edible seeds from wattle plants dried, and ground. They have very nutty, chocolaty and coffee flavours. It was used by the aboriginals for cooking and making bread and has become quite a popular spice lately because of their distinctive flavour, and can be found quite easily from gourmet food store. Because of their nuttiness, i decided to pair them with the coffee and almond crunch recipe, adapted from the October 2008 issue of Australian Good Food Magazines.


Bush Coffee Crunch Cake

Ingredients for the cake
  • 170g unsalted butter, at room temperature
  • 170g caster sugar
  • 3 large eggs
  • 1/2 tsp vanilla essence
  • 1/2 tsp coffee essence
  • 100g almond meal
  • 1/4 cup strong coffee
  • 2/3 cup SR flour
  • 1/2 tsp baking powder
  • 1 tsp wattleseedes
Ingredients from the crunch topping:
  • 60g plain flour
  • 40g demerara sugar
  • 1/3 cup pecan nuts ( optional )
  • 40g cold butter, cubed
Methods:
  1. Preheat the oven to 170 degree Celsius. Line a 20cm round cake pan with baking paper.
  2. To make the topping, mix flour and sugar in a bowl, and rub in cold butter until it resembles coarse breadcrumbs. Put in the fridge while making the cake.
  3. Beat the butter and sugar in a large bowl with electric mixer until light and fluffy. Beat in egg, one at a time until all combine. Add in the vanilla and coffee essence. Fold in the almond meal, alternating with half of the the strong coffee.
  4. Sift the SR flour, wattle seeds and baking powder together, gently fold the flour into the egg mixture, and add the other half of the strong coffee.
  5. Pour the cake batter into the prepared pan, and smooth the top. Scatter the topping and pecan nuts on top of the cake batter, and bake in the pre heated oven for about 1 hour.
  6. Remove from oven once cooked, and cool completely on a wire rack. Dust with icing sugar before serving.


The cake is loaded with heavenly coffee aroma and is very moist with a crunchy nutty toppings. The addition of wattleseeds is wonderful, and gives another layer of nuttiness and mocha flavours to the coffee aroma. It's not overly sweet, and I serve it warm with a dollop of chocolate custard ( ice-cream would have been perfect too! ).


After galloping 2 huge slices of the cake almost all at once, the husband put on a big smile, comforted me and promise me that I can always have fresh bouquet of flowers whenever i like on his credit card, at the same time, he took bags after bags of trash out to the bins. Suddenly, my house is less cluster, and I can see much clearer; it's the man that's should matter, not the moulding wedding flower!!

Monday, May 11, 2009

Mother's Maple Cheesecake


Mother's day was never a big event in our family when I was young. Growing up in a church, it's merely just another event of the many events. Also, my mother was such a practical mum that she never encourage us to buy anythings or do anything special on these days ( or any other days ). I still remember on some occasion, she used to buy our shampoo which were running low, and ask us to wrap it up and give it to her during the sunday school presentation as the sunday school teacher ask each kids to give a present to thank our mother during Mother's day!!! I seldom show my gratitude and appreciation towards her, and always took her for granted.

It was when I leave home to study aboard, and trying to live independently then i truly appreciate my mother. My first year was particularly a hard one, trying so hard to fit in and adapt the new culture, living with a foreign relatives, have to juggle my heavy uni workload, and trying to cook my own meals ( which i never did before!! ) How easy it was when I was living with mum that my only worries was to pass my exam. She would thoughtfully prepare many delicious and nutritious meals which according to her, is good for the brain . My mum is great in kitchen, so much so that we're never have to dirty our hands to cook. I must admit that I never touch any kitchen utensil other than the spoon and the fork ( if that's consider a kitchen utensil at all! ) After many years of living aboard, I've develop a closer relationship with the kitchen utensils, and cooking is not merely just for survival now, but a great enjoyment, and i often found my mum inside me when I'm preparing meals. I tend to do it just like she used to do it, it's a strange thing!! I guess the love of preparing food genes do runs in the family, from my grandmother, to my mother and to me.

I would love to bake my mother this cheesecakes when the parental visit next month. They love cheesecakes as they can't desired anything too sweet, and a good cheesecake is hard to find in Malaysia. I've never baked a whole cheesecakes before, so i decided to do a little experiments and practice well before their arrival. In addition, I can also take this opportunity to treats all those homesick overseas students in my church with my experimental cheesecake, it's very rich and good for the soul, the best we can make do during Mother's day, without our mothers!!


It's not hard to decide which cheesecake to experiment, the autumn wind is chilling, and there were falling maple leaves everywhere, perfect season for a rich, maple cheesecake!


Maple Cheesecake
Ingredients for the crust:
  • 8 digestive biscuits
  • 1/3 cups pecan nuts
  • 85g butter, melted

Ingredients for the cake:

  • 600g cream cheese
  • 50g caster sugar
  • 2 tsp cornflour
  • 125ml maple syrup, plus more for later
  • 4 eggs
  • 1/2 tsp lemon juice

Methods:

  1. Preheat the oven to 180 degree Celsius, or 160 degree if fan force.
  2. Grease and line a 20cm round spring foam cake tin with baking paper.
  3. Process biscuits and pecan nuts in the food processor until finely crushed.
  4. Add butter, combined well, and press the biscuit mixture firmly onto the base of the cake tin. Chilled in the refrigerator while making the cake filling.
  5. With a electric beater, beat the cream cheese until they are smooth, gradually beat in sugar, corn flour, maple syrup, eggs and lemon juice until well combine. Do not over beat or else it may cracks, or develop bubbles ( like mine :( ).
  6. Pour the cake fillings into the cake tin with the biscuit base. Wrap 2 layers of al foil around the cake tin to prevent water from sipping in from the water bath.
  7. Put the cake tin into a large baking tray, and pour boiling hot water around the cake tin. ( your cake tin should sit in the middle of the baking tray, with hot water around it )
  8. Bake in the preheated oven for about 1 hour and 3o mins. i check the cake every 10 mins after the 1st hour. When the cake is set but still a bit wobbly in the middle, it is done.
  9. Switch off the oven temperature, and cool the cheesecake in the oven with the door ajar, and then take it out and cool it to room temperature before leave it in the fridge overnight.
  10. Pour extra maple syrup over the cheesecake before serving. Best serve cold.


Because of my over beating, my cheesecake develop some bubble on the surface, but it's not a fatal one, and I'm overall very satisfied with the taste and texture of the cheesecake. This recipe is adapted from NQN, and she was very kind to give me a few tips and hints for baking this cheesecake as I'm very unsure about the water bath thing. Apparently, the most important thing with baking cheesecake is not to "shock" the cake, ie: the cake dun get shock when first entered the hot oven by baking it gently with the water bath, and the cake dun get shock when comes out of the oven by cooling it in the oven first and then room temp, and then fridge. If the cake is shock, it'll cracks, very much behave like us don't you think?!!!

I think it'll be the perfect welcoming cheesecake for my mum, and hopefully the first bite would shock her taste bud and she'll cracks a big smile!!